Tuesday, June 14, 2011

Sunroom Addition: Final Reveal

I have been SO behind on updating our sunroom progress!  For those you new to our blog, we started back in November with the idea of converting our covered back porch into a sunroom... And that idea grew into almost a complete room addition (you can read about our entire process)

I couldn't be happier with how it turned out!  And can't sing my husband's praises enough!  He built the entire room... planning, framing, wiring, putting up drywall, tiling the floors.  I still am amazed by how well he could do all of it!  We, of course, enlisted lots of great help from both our Dads, Jeff's brother, and lots of friends (especially from Amy's husband!)  Thank you to everyone who spent time helping us finish the room! 

So after a 5-month long process, we are finally done!  Well, done with construction... For those of you who know me, decorating is a definite iterative process (sorry, Jeff!)  Here is how it looks now...

Before:

After:

Before:

After:


One of my favorite elements in the room, the bead board ceiling....

Before:

After:

I wish I could capture on camera how much light this room lets into the kitchen and living room too, making the whole house feel much more open and inviting.  Definitely the perfect spot for entertaining, relaxing, or working at the desk.  Thanks to Jeff, this room is quickly becoming my favorite spot in the house!

What do you think?  What big projects have you tackled yourself?

Wednesday, June 8, 2011

Spring Project Updates: Living Room

As I mentioned last week, I've been behind in posting all of our before & afters from the spring project marathon a couple months ago.  We've continued to make small and large tweaks to our living room.  In our ranch home, it's the room you walk straight into from the front door.  And the room where we spend the majority of our time.  So I think it feels extra important to me to get it right.

Check out our house tour button (still in progress) to see the earliest 'before' shots of our living room... It's thankfully come along way!


And for a glimpse into the most recent 'before'...


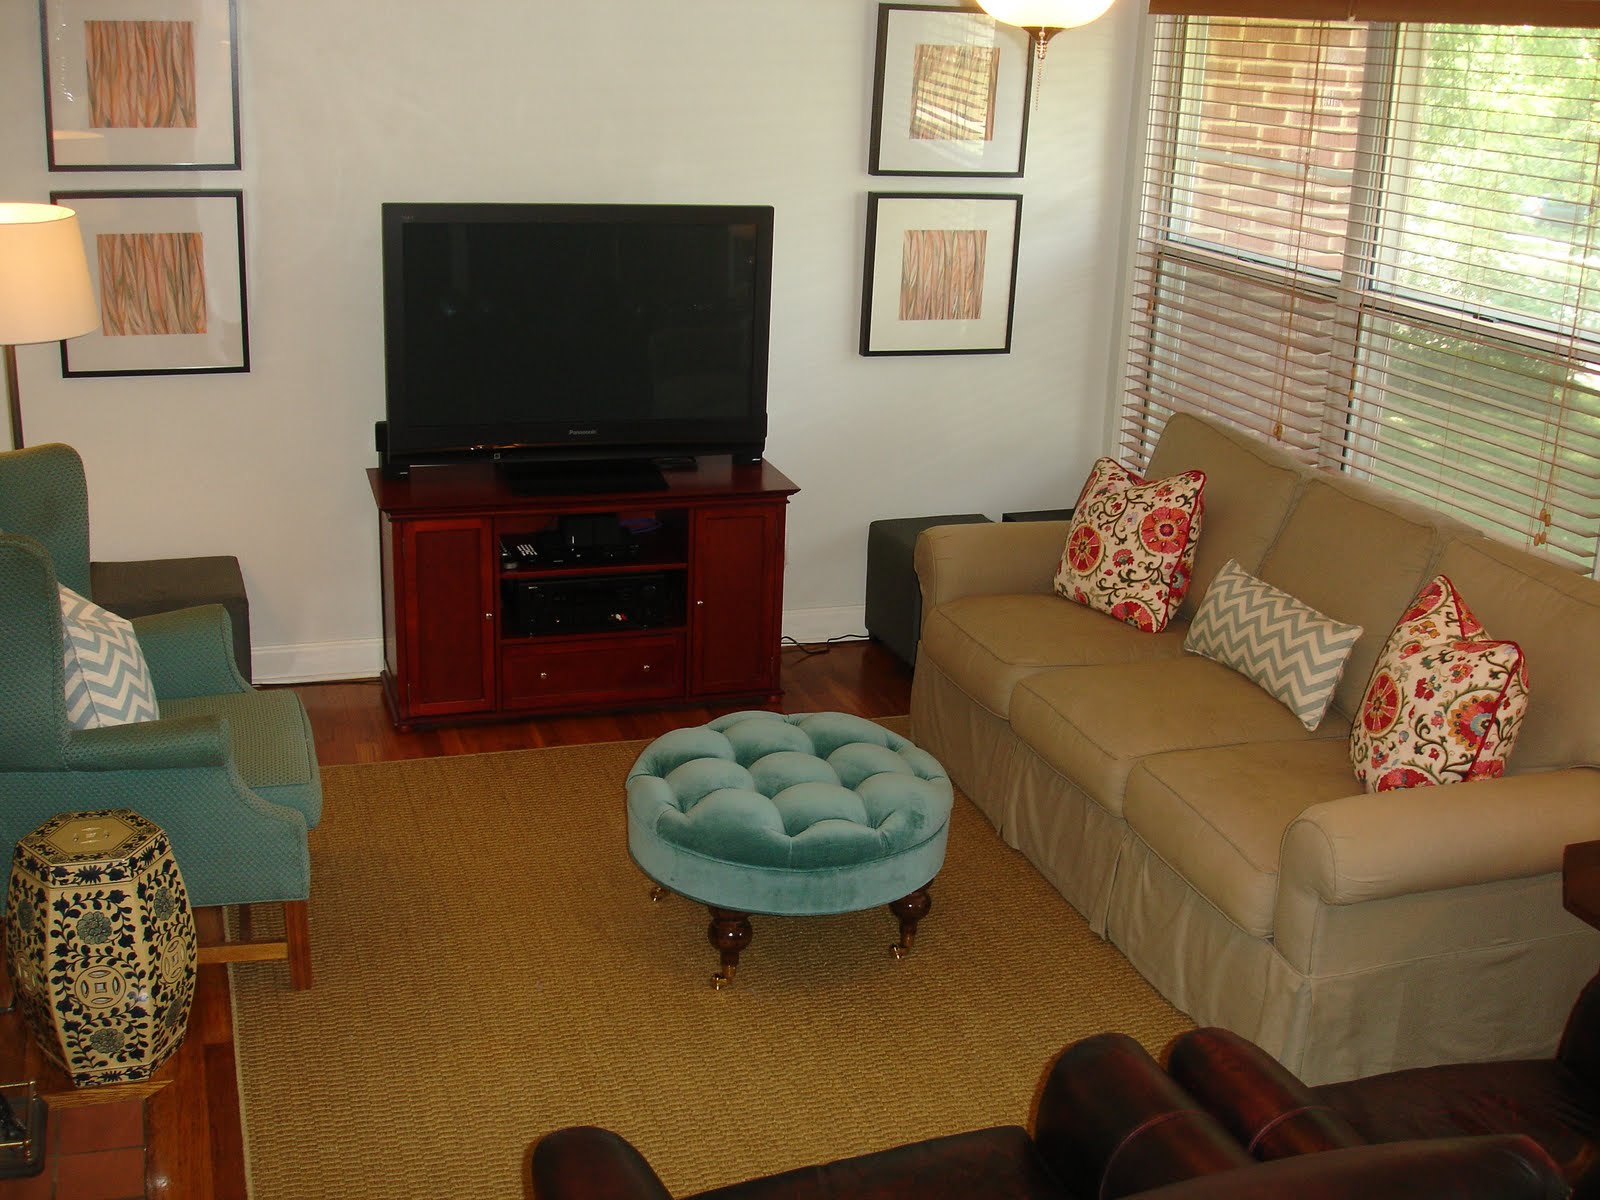
And After....


Not really a huge difference, but we just wanted to declutter and make the room feel more open.  So we swapped out the yellow love seat for a wing back chair we already owned.  Eventually, I'd like to get an off-white chair to replace it with, just to break up the blue tones by the new ottoman. 

We also moved out the bookshelf and flanked the tv console with two gray ottomans, also already owned.  They're perfect for extra seating!  We had my family over a few weeks ago, and everyone had a seat in the living room.

We also took the speakers off stands (finally!) and added some new artwork to the wall (post to come!)  I also splurged a lot a little and had the tufted ottoman made with my new favorite fabric.  It's on casters, which makes it perfect for when Jeff wants to pull it over to put his feet up & watch tv or when we put a tray on top to double as a coffee table.

Up next:  Hopefully mounting the tv to the wall (to level it with the frames), painting the tv console & swapping out the knobs, styling the mantel and finding a new side table...

For your blog roll

Exciting news!  My amazingly talented friend Sarah has just launched a new design blog!  She's currently an interior design student and has such a unique, eclectic style.

{right to left:  me, sarah, amy, shiva in nyc}

I'm so hopeful that her new blog will feature pictures and projects from her own home... In addition to chronicling her journey to open her own design business and store!

"I believe that design is a constantly changing process as it molds itself to suit and inspire our aesthetic as well as our conventional needs"

So without further ado, here is The Curator Collective!

Wednesday, May 25, 2011

Considering...

A few months ago, I picked up this campaign dresser for $25 at our local Goodwill.  Not bad for a full-size dresser and considering that a refinished campaign dresser was recently listed on our local Craigslist for $300!


It's in need of some love, so I planned to give it a coat of paint and call it a day.  Similar to these...


{images via Lonny}

{source unknown}

But I've done painted furniture before (best instructions I've found for painting coming soon!)  And for some reason, I'm feeling a little over the painted campaign dresser.  So I'm considering going a different way...

{via Bryn}


Surprisingly, I'm leaning towards staining the dresser a dark shade.  I wonder how difficult it would be to sand down and restain the dresser myself... Has anyone tried this before?  Any tips to share?

Monday, May 23, 2011

Recovering Kitchen Chairs

I debated recovering our kitchen chairs for a while... On one hand, I loved that the upholstery appeared to be original to the 1970s Henredon chairs (snagged for a major deal at Sleepy Poet about two years ago).  On the other hand, they were really starting to show their age.

The construction zone that was our house for 5 months, during the sunroom addition, answered the question for me.  All of the dust certainly did no favors for the wear & tear of the chairs... So recovering was a go!

I hit up Mary Jo's (one of my favorite weekend spots) and found this perfect-shade-of-gray linen fabric for the chairs.


I also picked up some batting to fill out the seats.  The original plan was to remove the entire old fabric, add batting, and recover.  A few too many original staples sent me the easy way out...

We unscrewed the base of the seat from the frame, cut pieces of batting to the same size as the seat, and cut the fabric a few extra inches wider than the seat (allowing for enough extra fabric to staple down).

Then we laid the batting over the top of each seat, covered with the fabric, and stapled to the bottom with a staple gun (with one of us pulling the fabric tightly and the other stapling down).  We stapled once around the seat, then went back and stapled even closer together.

For the corners, we folded the edges (like wrapping a present) so that the front would appear flat and the only folded edge would be off to the side.


Then we cut away any excess fabric and re-attached the seats.  For a refreshed final result...


It was so much easier than I thought!  One Friday night (I know, we're so fun) and the project was done!  Have you ever done a DIY reupholstery project?  How did it turn out?

Tuesday, May 17, 2011

No Sew Skirted Console Table

I struggled with what furniture to put on the back wall in our living room.  It couldn't take up too much space, needed to serve as part of our entryway, and provide some much-needed storage.  In the end, I settled on a skirted console table.

I originally planned to use the console table that my parents gave us.  However, I knew it would be a no-sew project, which means lots of staples into a nice piece of furniture (not ideal).  Additionally, I wanted the table to be taller, so I'd need to raise it with bed risers (also not ideal). 

{entryway & table before}

Jeff wasn't a fan of this plan either, and in about 30 minutes built me a console table with scrap wood from our shed!  He also added a shelf, so that we'd have the additional storage needed.  So for $0 we had a custom console table, ready for a skirt!

{Jeff demonstrating the new table's sturdiness}

{view of final table... excuse the unfinished floors!}

I based our skirt off of instructions from Camila at Effortless Style and Jennifer at Newlywed Diaries.  To start with the bottom: Camila used various panels to create a faux pleat in her skirted table.  I took this idea and simplified it for our smaller one.  Instead of 5 panels, we only needed 3.

I cut 2 panels to wrap around the corners and 1 small strip to go down the middle of the table to create a center 'pleat.'  Since I knew the console table would be against the wall, I just wrapped the corner panel a few inches around the back (that's all you would be able to see anyway).

Then I used Stitch Witchery iron-on hem tape to finish the edges (only the ones that would be exposed eventually).  This could not have been easier, and so far the iron-on tape has held really well!

{finished corner}

I also used Stitch Witchery to iron-on the Greek Key trim around the bottom of all the panels.  I just used double rows of tape to make sure the bottom and top of the wide trim was secure.


Jeff was sweet enough to help me with the staple gun.  We stapled the middle section first then layered the 2 corner panels on top to create our pleat.

{shelves already filling up}

For the top, we followed Jennifer's instructions, measuring our fabric and leaving a little overhang on the sides.  We stapled the top piece along the front edge first, with the bulk of the fabric hanging off the front of the table.  So we were actually stapling the underside of the fabric down to the table (sorry we forgot to take pictures here).  Then we folded the top back over itself to create a clean edge.


Next we folded under the sides and placed a little strip of Stitch Witchery underneath and ironed down those edges (and a little over the stapled front pleat to finish it off more)  Lastly, we stapled the back edge of the top panel to the back edge of the table (we stapled down on the underside to make sure no staples were visible from the top of the table)

And here is our finished skirted console table...


The no-sew skirt has been on my list for awhile, and I have to admit being pleasantly surprised with our finished table!  I couldn't be happier with how it came out!

Tuesday, May 10, 2011

Quick Bathroom Update

About a month ago, I started the process of redecorating our guest bathroom. As was the case with many of the rooms when we first moved in, I took colors and things I liked (many admittedly purchased on impulse), threw them all together, and thought I was done.

For the bathroom, the end result was blue walls, a bright yellow shower curtain, and a DIY red mirror. Not exactly the welcoming, peaceful experience that a guest bath should create.


So I started with an easy update to make any room brighter: paint. I went with Benjamin Moore’s Paper White. It is an off-white with just a slight hint of blue (actually very similar to Horizon, which I repainted our living room, kitchen & hallway – but less gray)

{painting progress}

Up next was to remove the gigantic towel bar beside the sink. I have a feeling that no guest of our’s will really need a 4-tiered towel rack, no matter how long they stay. And we also sent off the wobbly glass shelf above the toilet. I’ve seen bathrooms that these look great in, but our’s was just a junk collector.


I replaced all the hardware with a matching polished nickle set from Lowe’s, and Jeff even replaced the electrical outlets and light switch with fresh plates (who puts in black outlets anyway? what an eyesore!)


{before & after}

We also added a bright white shower curtain, to keep the room feeling as open and bright as possible. I had it monogrammed in dark gray (interesting fact: the woman at the shop told me that it used to be that the man’s initial always went first, but now people don’t keep to that as much… So we put the J first, because otherwise we would’ve had a huge space between the C and W – then almost no space between the W and J. Sorry Emily Post, aesthetics trump tradition this time)

 
{before}

{after}

I also ordered my new favorite rug from Garnet Hill (also have one in our kitchen now) in gray...


...and this cute print from Etsy. I framed the ‘Keep Calm & Soak On’ print along with one of my favorites that Jeff’s grandpa painted in matching Target frames.


I’m so happy that we decided to spruce up the guest bath some. Not a major overhaul, but enough to make it feel brighter and more guest-friendly!


{before & after}

Psst... Apologies for the many weird camera angles.  As you can tell from the picture of the rug/floor, this room is small!  And the tight space meant not so great overall pictures.